Tips for the Athletic Scheduler
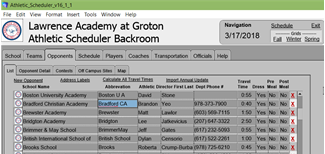
Tip #1 - Opponent Level, LK & League
Tip #1 - Opponent Level, LK & League
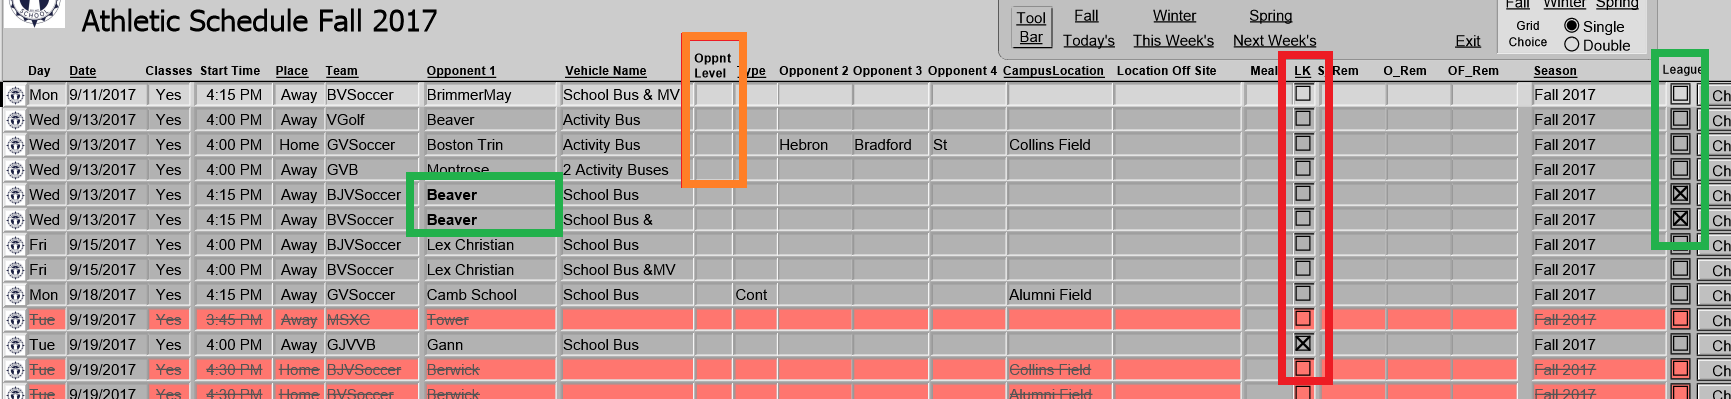
1) Opponent Level - is actually for the situation when your team is a different level than the opponent. For instance, your JV is playing their Varsity. By the team name we already know that our team is JV level.
2) LK - is short for Lock and it locks the logistic detail for a contest so that when you run the Logisitcis calculator it won't change it's logistics.
3) League - is a check box to indicate a league contest. When checked, the Opponent appears in bold letters.
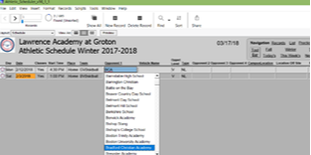
Tip #2 - Schedule Layout
2) LK - is short for Lock and it locks the logistic detail for a contest so that when you run the Logisitcis calculator it won't change it's logistics.
3) League - is a check box to indicate a league contest. When checked, the Opponent appears in bold letters.
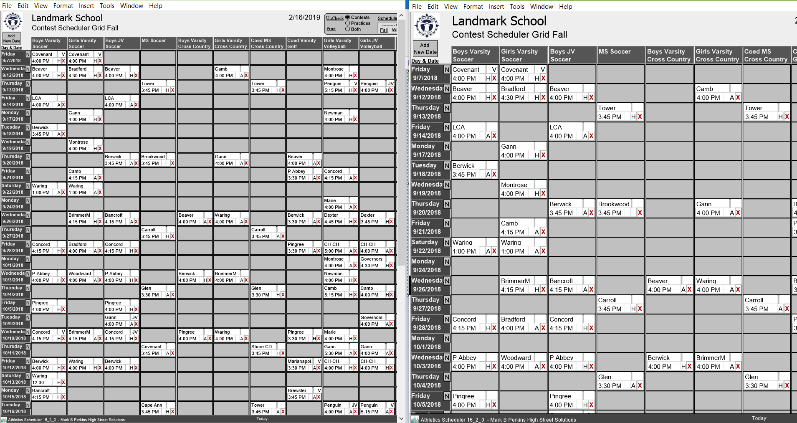
Tip #2 - Schedule Layout
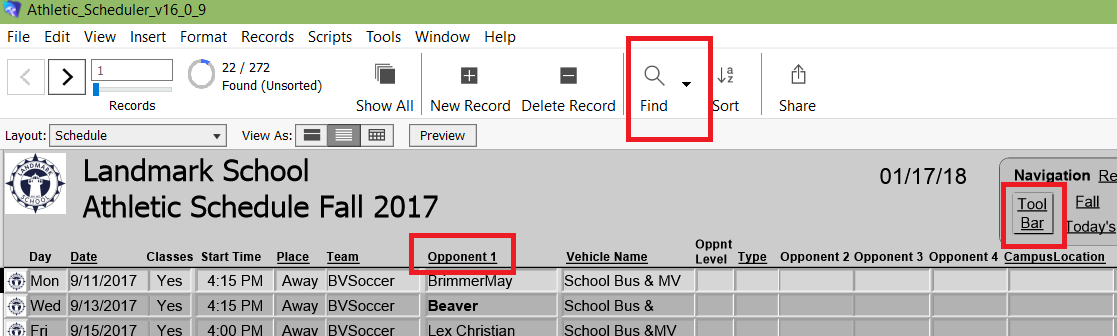
1) Tool Bar – toggles the Tool Bar between show and hide to show more contest on your layout.
2) Underlined Heading – Any heading which is underlined is also a button for sorting the found set on that field. For example, Opponent 1 is underlined, so click on it and your contests will be sorted by Opponent.
3) Find – find any set of contests by clicking on the Find button and entering the criteria in the appropriate field. For example, to find all Boys Varsity Soccer contests, click on Find and select Boys Varsity Soccer in the team field, then click on the Perform Find button.
Tip#3 - Drop Down Menus
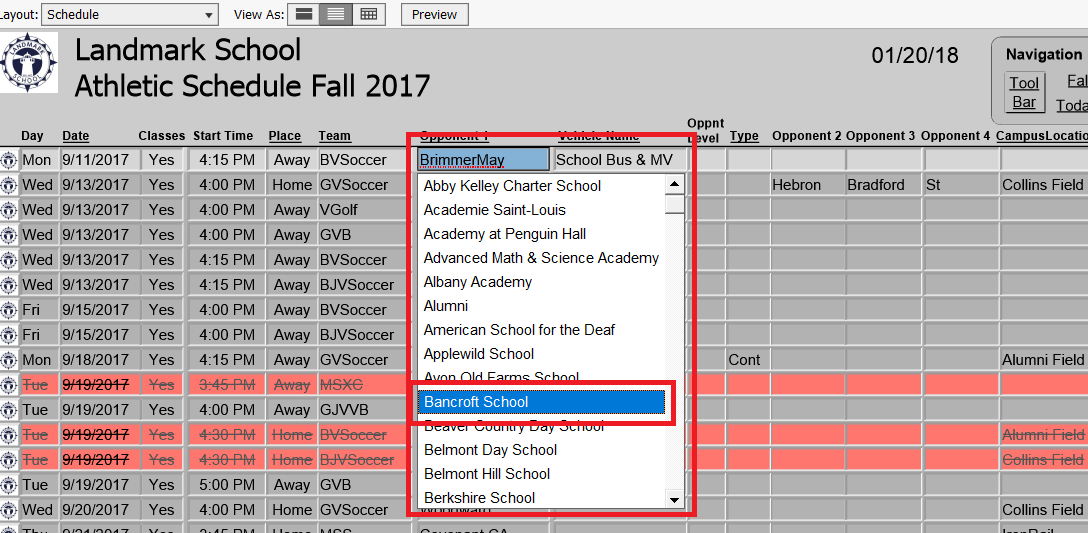
1) Drop Down Menu – when you are in a drop down menu, type the first or first and second letter of the item you want and the menu will jump to that place in the alphabet.
Tip #4 - Setting Team Name Order - Boys JV Football or JV Boys Football?
Tip #4 - Setting Team Name Order - Boys JV Football or JV Boys Football?
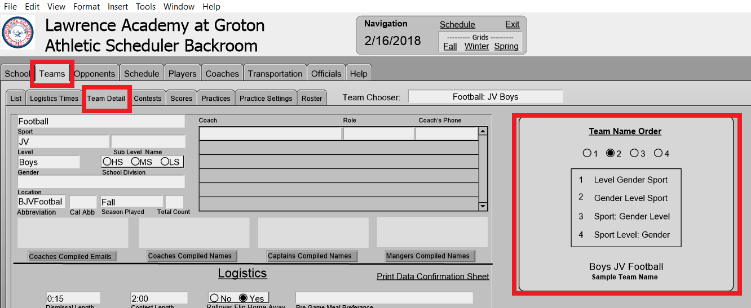
It is important to set your preferred Team Name order. There are four orders available:
1) Level Gender Sport
2) Gender Level Sport
3) Sport Gender Level
4) Sport Level Gender
Go to the Team/Team Detail tabs in the Backroom. Here you will find the Team Name Order box. You will see a sample of each order when you click on a different order button. For example, 2) shows Boys JV Football. If you have already entered scheduled contests, a pop up will ask you to ok a lookup. Click “OK” and the Athletic Scheduler will re-lookup the values of fields based on Team Id#. Depending on how many contest records you have, this may take a minute or two.
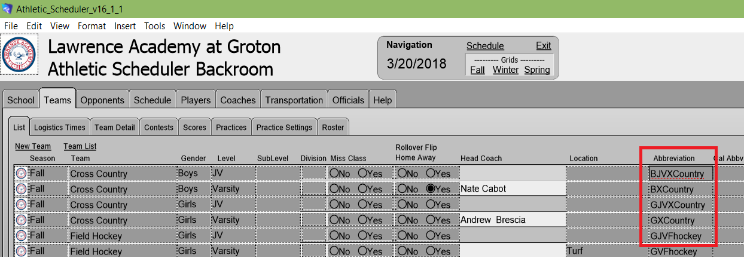
Tip #5 - Changing Opponent Abbrevations
1) Level Gender Sport
2) Gender Level Sport
3) Sport Gender Level
4) Sport Level Gender
Go to the Team/Team Detail tabs in the Backroom. Here you will find the Team Name Order box. You will see a sample of each order when you click on a different order button. For example, 2) shows Boys JV Football. If you have already entered scheduled contests, a pop up will ask you to ok a lookup. Click “OK” and the Athletic Scheduler will re-lookup the values of fields based on Team Id#. Depending on how many contest records you have, this may take a minute or two.
Tip #5 - Changing Opponent Abbrevations
|
|
You may want to use a different Opponent Abbreviation than the one supplied with your Athletic Scheduler. (Note: the opponent abbreviation should be kept to 12 characters as space is limited on some layouts.) The procedure varies with two cases: 1) you have NOT added contests with this opponent and 2) you have.
Tip #6 – Changing Team Abbreviations
- Case I – you have NOT added any contests with this opponent yet.
- Go to the Opponent tab in the Backroom and scroll down through your list to the opponent you wish to change.
- Click into the Abbreviation field and modify the abbreviation to the new one.
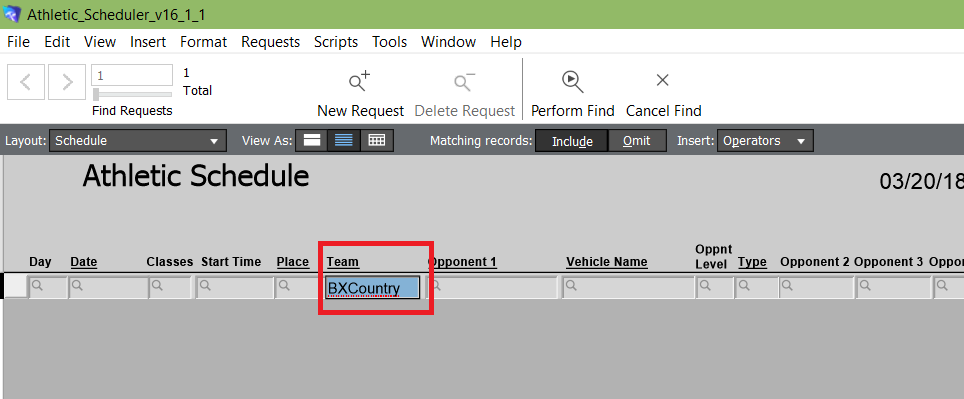
- Case II – you have added contests with this opponent already.
- Go to the Opponent tab in the Backroom and scroll down through your list to the opponent you wish to change.
- Click into the Abbreviation field and copy the abbreviation, then modify the abbreviation to the new one.
- Now go to your schedule layout and do a find for all contests with the old opponent abbreviation by clicking on Find and pasting the old abbreviation in the opponent field and click on Preform Find.
- Now click into each opponent field of each record and select the new abbreviation.
- Repeat d & e for each opponent field
Tip #6 – Changing Team Abbreviations
|
|
You may want to use a different Team Abbreviation than the one supplied with your Athletic Scheduler. (Note: the team abbreviation should be kept to 12 characters as space is limited on some layouts.) The procedure varies with two cases: 1) you have NOT added contests with this team and 2) you have.
Tip #7 – Adding Special Dates
- Case I – you have NOT added any contests with this team yet.
- Go to the Teams tab in the Backroom and scroll down through your list to the team you wish to change.
- Click into the Abbreviation field and modify the abbreviation to the new one.
- Case II – you have added contests with this team already.
- Go to the Teams tab in the Backroom and scroll down through your list to the team you wish to change.
- Click into the Abbreviation field and copy the abbreviation, then modify the abbreviation to the new one.
- Now go to your schedule layout and do a find for all contests with the old team abbreviation by clicking on Find and pasting the old abbreviation in the team field and click on Preform Find.
- Now click into each team field of each record and select the new abbreviation.
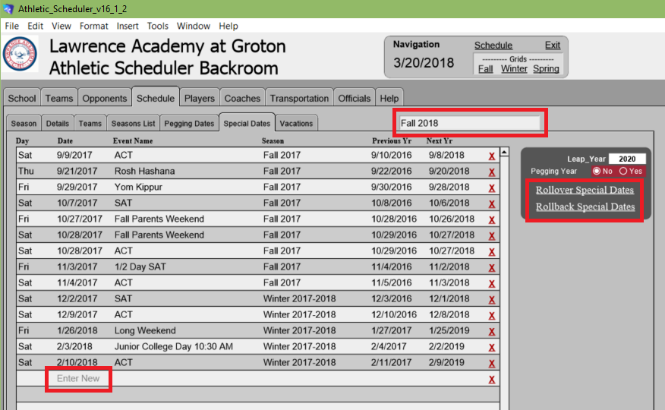
Tip #7 – Adding Special Dates

|
|
Special Dates appear with an orange background to remind you that the contest is on a date that is different from your regular dates, such as SATs, Grandparents, or Exam Week, etc.
To enter your special dates, go to the Schedule Tab of the Backroom and click on the Special Dates tab. Here you can enter your special dates by clicking into the row marked “Enter”.
At the end of the season, you can rollover your special dates just as you would your schedule, but use the buttons on this tab, so they will be there for you in the new season. Simply select the Season you want to rollover and click on the corresponding button. You also have a rollback button in case you need to go back.
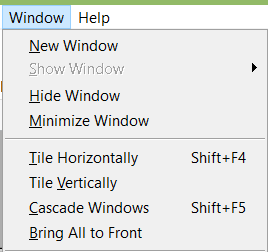
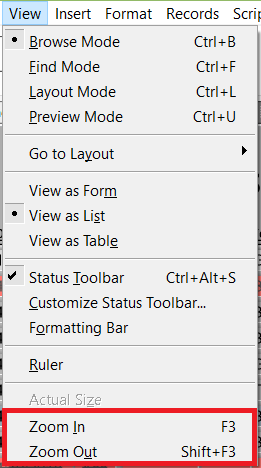
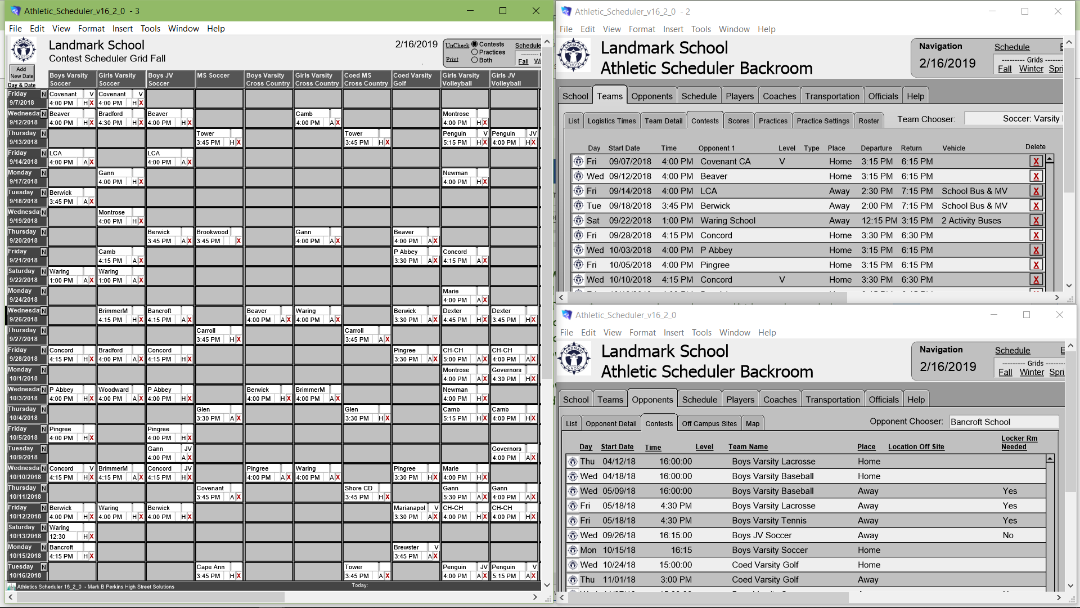
Tip #8 - Window Adjustments
|
|
Windows in the Athletic Scheduler can be duplicated and adjusted to any view you would like to have.
To create a new window or have multiple windows, click on Window in the Filemaker menu across the top of your layout. There you have many choices for controlling multiple windows. You can tile them so they take equal space or manually manipulate them to produce the view of your choice.
You can also resize the text of a window by zooming in or out in the View dropdown menu.
